 Today, I will write some sample code to show you how to make a ListView in Android which is populated using data from Google App-Engine's Datastore and Blobstore. This article assumes you have at least some working knowledge of Google App-Engine, Java Servlet and Android programming. Our sample application will model a list of Item objects, which you can modify to contain your own unique attributes specific to your own data model. I will also show you one method of displaying images in the list as icons which can be uploaded with a list Item when added via the App Engine servlet.
Keep in mind that Android does not have native support for Google App Engine as of current. In order to connect our Android application to our App Engine data, we need to think about how we are going to pass information between the Datastore and the Android application. For my example I will pass the data in the form of an XML file, however you can use JSON or even HTTP if you desire. I chose XML since it's easily parsed using SAX.
Alright, the basic structure of our data model is fairly straight forward. I've drawn a diagram to help visualize the components of the end-to-end application structure below:

First, let's create our App-Engine backend and get it to the point where we can add items to the Datastore cloud via an HTML form. I will be using Eclipse to deploy my App-Engine code in Java. You can use Python for this portion of the application, although I prefer to use Java servlet since Eclipse is such a great tool when developing for App-Engine.
In Eclipse, create a new Web Application Project for use with App-Engine:

This is what our final App-Engine project structure will look like in Eclipse. I will then go over the required code that needs to be written in order to serve the XML data.

The first the JSP (Java Server Page) and Servlet (Handler) that we want to write is the addItem.jsp and PostItem.java. Right click on /war directory of your project and create New->JSP File. (If you do not have the Eclipse WTP plugin, get it here Eclipse WTP Plugin)

//addItem.jsp
<%@ page contentType="text/html;charset=UTF-8" language="java" %>
<%@ page import="com.google.appengine.api.blobstore.BlobstoreServiceFactory" %>
<%@ page import="com.google.appengine.api.blobstore.BlobstoreService" %>

<% BlobstoreService blobstoreService = BlobstoreServiceFactory.getBlobstoreService(); %>
<html>
<head>
<title>Add Item to List</title>
<link rel="stylesheet" href="css/style.css" type="text/css" />
</head>
<body>
 <center><h1>Add Item to List</h1>
 <table>
  <tr>
   <td><a href="viewItems.jsp">List of Items</a></td><td><a href="/serve">View XML</a></td>
  </tr>
 </table>
 </center>
 <form action="<%=blobstoreService.createUploadUrl("/postItem") %>" method="post" enctype="multipart/form-data">
 <table class="editTopic">
 <tr>
 <th colspan="100%" class="main"> New Item: </th>
 </tr>
    <tr>
       <td class="label">Title: </td>
       <td class="left"><div><input size="35" type="text" name="title"></div></td>
    </tr>
    <tr>
       <td class="label">Description:</td><td class="left"><div><input size="35" type="text" name="desc"></div></td>
    </tr>
    <tr>
       <td class="label">Package:</td><td class="left"><div><input size="35" type="text" name="pkg"></div></td>
    </tr>
    <tr>
     <td class="label">File:</td>
     <td class="left">
        <input type="file" name="appImg">
     </td>
    </tr>
    <tr>
  <td colspan=100%><input class="button new" type="submit" value="Add to List" /></td>
    </tr>
 </table>
 </form>
</body>
</html>
The page should look something like this:
Now that we have the page layout completed, we can start coding the servlet which will handle the post data coming from the Add Item page. Notice the line of code in addItem.jsp:
form action="<%=blobstoreService.createUploadUrl("/postItem") %>" method="post" enctype="multipart/form-data">
This tells our web application that we want to handle the post data using the servlet mapped to /postItem. In order for our HTML form to be able to connect to the servlet /postItem we need to first map the servlet in our web.xml file. Add the following code to your /WEB-INF/web.xml file:
<servlet>
  <servlet-name>PostItem</servlet-name>
  <servlet-class>net.jfierstein.listsample.PostItem</servlet-class>
 </servlet>
<servlet-mapping>
  <servlet-name>PostItem</servlet-name>
  <url-pattern>/postItem</url-pattern>
 </servlet-mapping>
Now that we have the Servlet mapped such that we can visit /postItem and it will direct to the correct Java Servlet class, we can now create the PostItem class in our Web Application project. Right click on your source package (net.jfierstein.listsample) and create New->Class. Name your class "PostItem".
//PostItem.java
package net.jfierstein.listsample;

import java.io.IOException;
import java.util.Map;

import javax.jdo.PersistenceManager;
import javax.servlet.http.HttpServlet;
import javax.servlet.http.HttpServletRequest;
import javax.servlet.http.HttpServletResponse;

import com.google.appengine.api.blobstore.BlobKey;
import com.google.appengine.api.blobstore.BlobstoreService;
import com.google.appengine.api.blobstore.BlobstoreServiceFactory;

public class PostItem extends HttpServlet
{
   private BlobstoreService blobstoreService = BlobstoreServiceFactory.getBlobstoreService();

   public void doPost(HttpServletRequest req, HttpServletResponse resp) throws IOException
   {
      String title = req.getParameter("title");
      String description = req.getParameter("desc");
      String pName = req.getParameter("pkg");
      Map blobs = blobstoreService.getUploadedBlobs(req);
      BlobKey blobKey = blobs.get("appImg");
      PersistenceManager pm = PMF.get().getPersistenceManager();
      Item item = new Item(title, description, pName, blobKey.getKeyString());
   //persist
      try{ pm.makePersistent(item); }
      finally{ pm.close(); }
      resp.sendRedirect("viewItems.jsp");
   }
}
So now we have an almost working Web Application that will add Items to our app-engine datastore. We still have a few more steps before we can test the first leg of our application. First, We need to create a quick static class called PMF.java that will handle the persistence in App-Engine, and the Item class which will define the model for our data to be stored.
Create the class PMF.java
//PMF.java
package net.jfierstein.listsample;

import javax.jdo.JDOHelper;
import javax.jdo.PersistenceManagerFactory;

public final class PMF
{
    private static final PersistenceManagerFactory pmfInstance =
        JDOHelper.getPersistenceManagerFactory("transactions-optional");

    private PMF() {}

    public static PersistenceManagerFactory get()
    {
        return pmfInstance;
    }
}
Everytime we need to do any persistence management, we will reference this class to get an instance of the PersistenceManager for App-Engine.Next, create Item.java
//Item.java
package net.jfierstein.listsample;

import com.google.appengine.api.datastore.Key;
import javax.jdo.annotations.IdGeneratorStrategy;
import javax.jdo.annotations.PersistenceCapable;
import javax.jdo.annotations.Persistent;
import javax.jdo.annotations.PrimaryKey;

@PersistenceCapable
public class Item
{
    @PrimaryKey
    @Persistent(valueStrategy = IdGeneratorStrategy.IDENTITY)
    private Key key;
    @Persistent
    private String title;
    @Persistent
    private String description;
    @Persistent
    private String pkg;
    @Persistent
    private String imgKey;

    public Item(String title, String desc, String pkg, String imgKey)
    {
        this.title = title;
        this.description = desc;
        this.pkg = pkg;
        this.imgKey = imgKey;
    }
    public Key getKey()
    {
        return key;
    }
    public String getImageKey()
    {
     return imgKey;
    }
    public String getTitle()
    {
        return title;
    }
    public String getDescription()
    {
        return description;
    }
    public String getPackage()
    {
        return pkg;
    }
    public void setImgageKey(String k)
    {
     this.imgKey = k;
    }
    public void setTitle(String t)
    {
     this.title = t;
    }
    public void setDescription(String d)
    {
     this.description = d;
    }
    public void setPackage(String p)
    {
     this.pkg = p;
    }
}
Also, we will need another special class that isn't really a model for Data, but more of single Object called DBinfo that will contain meta-data regarding the state of our Database such as the version and the blob key for our actual XML file (which we will need when writing the servlet for serving the XML data). Any time we do an update to the Datastore, we want to update the version attribute within DBInfo whenever we make changes to our App-Engine datastore such that we can compare the version in the XML file in Android to that online, ensuring our Data is actually in sync with what it live on our website.
**Note that DBInfo will need to be manually uploaded to the Datastore. It only needs to be uploaded once, as it should be the only instance of the DBInfo class that exists in the live Datastore. Normally I just create a dummy .jsp file with the hard code written to upload the one instance and then just delete the .jsp from the project before I deploy to App-Engine.
//DBInfo.java
package net.jfierstein.listsample;

import java.util.Date;

import javax.jdo.annotations.IdGeneratorStrategy;
import javax.jdo.annotations.PersistenceCapable;
import javax.jdo.annotations.Persistent;
import javax.jdo.annotations.PrimaryKey;

import com.google.appengine.api.datastore.Key;

@PersistenceCapable
public class DBInfo
{
    @PrimaryKey
    @Persistent(valueStrategy = IdGeneratorStrategy.IDENTITY)
    private Key key;
    @Persistent
    private long version;
    @Persistent
    private String blobKey;

 public DBInfo()
    {
     Date date = new Date();
     this.version = date.getTime();
     this.blobKey = "";
    }
 public Key getKey()
 {
  return this.key;
 }
    public void setVersion()
    {
     this.version = new Date().getTime();
    }
    public void setXMLBlob(String newBlobKey)
    {
     this.blobKey = newBlobKey;
    }
    public String getXMLBlob()
    {
     return this.blobKey;
    }
    public long getVersion()
    {
     return this.version;
    }
    public String toString()
    {
     return String.valueOf(version);
    }
}
Then finally we will need to create the viewItems.jsp page that will display our current list of Items, and then servlets that will handle serving images and XML data to the app.
//viewItems.jsp
<%@ page contentType="text/html;charset=UTF-8" language="java" %>
<%@ page import="java.util.*" %>
<%@ page import="javax.jdo.Query" %>
<%@ page import="javax.jdo.PersistenceManager" %>
<%@ page import="com.google.appengine.api.users.User" %>
<%@ page import="com.google.appengine.api.datastore.Key" %>
<%@ page import="com.google.appengine.api.users.UserService" %>
<%@ page import="com.google.appengine.api.users.UserServiceFactory" %>
<%@ page import="java.net.*" %>
<%@ page import="net.jfierstein.listsample.*" %>

<html>
<head>

<title>Manage Items in Android List</title>
<META HTTP-EQUIV="Refresh" CONTENT="450">
<link rel="stylesheet" href="css/style.css" type="text/css" />

</head>
<center><h1>Manage Items</h1>
<input type="button" value="Update List" class="button big" OnClick="window.location.href='update'" />
</center>
<body>
<br />
<%
    PersistenceManager pm = PMF.get().getPersistenceManager();
 Query query = pm.newQuery("select from " + Item.class.getName());
 List<Item> items = (List<Item>) query.execute();
 Query dbinf = pm.newQuery("select from " + DBInfo.class.getName());
 List<DBInfo> dbInfo = (List<DBInfo>) dbinf.execute();
    if(items.isEmpty())
    {
%>
<table class="items">
<tr>
  <th class="main">Title</th><th class="main">Description</th><th class="main">Package</th><th class="main">Image Key</th>
</tr>
  <tr class="lightBlue"><td class="actions" colspan=100%>
   <p>No items were found.</p>
  </td></tr>
</table>

<%
    }
else {
 %>

  <table class="topics">
  <tr>
    <th class="main">Title</th><th class="main">Description</th><th class="main">Package</th><th class="main">Image Key</th>
  </tr>
<%
  int row = 0;
  String rowClass = null;
                for (Item i : items)
                {
            if(row%2==0)
            {
                   rowClass = "lightBlue";
            }
         else rowClass = "normal";
         row++;
%>
   <tr class="<%=rowClass%>">
    <td class="lob"><p><b><%= i.getTitle() %></b></p></td>
    <td class="category"><p><b><%= i.getDescription() %></b></p></td>
    <td class="topic"><p><b><%= i.getPackage() %></b></p></td>
    <td class="topic"><p><b><%= i.getImageKey().substring(0,15) %></b></p></td>
   </tr>
<%
                }
%>
  </table>
<%
    pm.close();
}
%>
  </body>
</html>
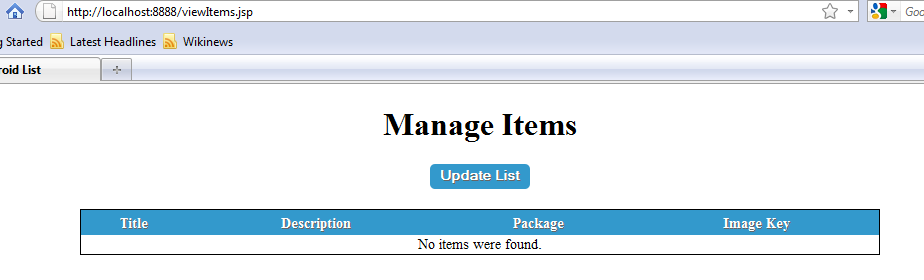
This page will display all the Items in your Datastore, along with the respective Blob key associated with the image for that item. In order to test that all the code we have written so far works as expected, we run the Web Application locally through Eclipse by right clicking on the project and choosing Run As->Web Application. In the console you will see the server launch:

Remember we have not written the serve functionality for images and for the XML data. We are just doing a quick test to make sure we don't have JSP or Servlet errors so far. If all is correct, you should see a console output similar to the above when you run your Web Application.
Navigate to http://localhost:8888/viewItems.jsp in your browser and you should see the following:


Create a new class called Serve.java. This will basically serve up Blobs from the blobstore based on the BlobStore Key that is assigned to every file uploaded. Here is the code for Serve.java
//Serve.java
package net.jfierstein.listsample;

import java.io.IOException;
import javax.servlet.http.HttpServlet;
import javax.servlet.http.HttpServletRequest;
import javax.servlet.http.HttpServletResponse;

import com.google.appengine.api.blobstore.BlobKey;
import com.google.appengine.api.blobstore.BlobstoreService;
import com.google.appengine.api.blobstore.BlobstoreServiceFactory;


public class Serve extends HttpServlet
{
 private BlobstoreService blobstoreService = BlobstoreServiceFactory.getBlobstoreService();

 public void doGet(HttpServletRequest req, HttpServletResponse resp) throws IOException
 {
        BlobKey blobKey = new BlobKey(req.getParameter("id"));
        blobstoreService.serve(blobKey, resp);
 }
 public void doPost(HttpServletRequest req, HttpServletResponse resp) throws IOException
 {
  doGet(req, resp);
 }
}
The code for this is basically the same as it is in the App-Engine Blobstore documentation overviewing the BlobStore API. Stop the local server by pressing the red square or ending the process. Save the Serve.java file and add the following to your WEB-INF/web.xml file:<servlet> <servlet-name>Serve</servlet-name> <servlet-class>net.jfierstein.listsample.Serve</servlet-class> </servlet> <servlet-mapping> <servlet-name>ServeBlob</servlet-name> <url-pattern>/serveBlob</url-pattern> </servlet-mapping>This tells our web application whenever we hit the URL /serveBlob that it is mapped to the Serve.java class. Make one quick change to the viewItems.jsp in order to display the full Blob Key string. We're going to want to copy and paste it to test our Serve servlet.
Edit the line:
<td class="topic"><p><b><%= i.getImageKey().substring(0,15) + "..." %></b></p></td>so that it reads...
<td class="topic"><p><b><%= i.getImageKey()%></b></p></td>Now restart the local server and test that this works. Navigate to the viewItems.jsp page and copy the full blob key string for the entry we just made. Now type the following url using your blob key string:
http://localhost:8888/serveBlob?id=your-blob-key-string-here
Replace your-blob-key-string-here with your blob key string (obviously). You should see your image appear in the browser like so:

Create a new class called ServeXML.java Here is my code for ServeXML.java:
//ServeXML.java
package net.jfierstein.listsample;

import java.io.IOException;
import java.util.List;

import javax.jdo.PersistenceManager;
import javax.jdo.Query;
import javax.servlet.http.HttpServlet;
import javax.servlet.http.HttpServletRequest;
import javax.servlet.http.HttpServletResponse;

import com.google.appengine.api.blobstore.BlobKey;
import com.google.appengine.api.blobstore.BlobstoreService;
import com.google.appengine.api.blobstore.BlobstoreServiceFactory;


public class ServeXML extends HttpServlet
{
 private BlobstoreService blobstoreService = BlobstoreServiceFactory.getBlobstoreService();

 public void doGet(HttpServletRequest req, HttpServletResponse resp) throws IOException
 {
  //first query all items
     PersistenceManager pm = PMF.get().getPersistenceManager();
  Query dbinf = pm.newQuery("select from " + DBInfo.class.getName());
  List<DBInfo> dbInfo = (List<DBInfo>) dbinf.execute();
  DBInfo currentInfo = (DBInfo)dbInfo.get(0);
  String blobKey = currentInfo.getXMLBlob();
  BlobKey key = new BlobKey(blobKey);
        //serve blob to response
  blobstoreService.serve(key, resp);
 }
 public void doPost(HttpServletRequest req, HttpServletResponse resp) throws IOException
 {
  doGet(req, resp);
 }
}
This is very similar to our other Serve.java class. The main difference is ServeXML.java is specifically for serving our ONE XML file. The BlobKey for this, if you recall from earlier, is located as an attribute in our single DBInfo structure.
Please understand what is happening in the following lines:
//first query all items
     PersistenceManager pm = PMF.get().getPersistenceManager();
  Query dbinf = pm.newQuery("select from " + DBInfo.class.getName());
  List<DBInfo> dbInfo = (List<DBInfo>) dbinf.execute();
  DBInfo currentInfo = (DBInfo)dbInfo.get(0);
  String blobKey = currentInfo.getXMLBlob();
  BlobKey key = new BlobKey(blobKey);
First, we are querying the Datastore for any instances of DBInfo. We should only have one, thus when the Query returns a list of DBInfo objects, we simply call dbInfo.get(0) to retrieve our DBInfo object. We can now extract our BlobKey and serve the XML file to the HTTP response.//serve blob to response blobstoreService.serve(key, resp);
As noted earlier, we need to manually upload an instance of DBInfo to our Datastore initially so that any calls to ServeXML.java will not throw an exception. I created the following JSP page to manually upload an instance of DBInfo to the Datastore.
//makeInfo.jsp
<%@ page contentType="text/html;charset=UTF-8" language="java" %>
<%@ page import="java.util.*" %>
<%@ page import="javax.jdo.PersistenceManager" %>
<%@ page import="net.jfierstein.listsample.*" %>
<%@ page import="com.google.appengine.api.blobstore.BlobstoreServiceFactory" %>
<%@ page import="com.google.appengine.api.blobstore.BlobstoreService" %>
<%@ page import="com.google.appengine.api.blobstore.BlobKey" %>
<%@ page import="com.google.appengine.api.datastore.Key" %>
<%@ page import="com.google.appengine.api.datastore.KeyFactory" %>
<%@ page import="javax.jdo.Query" %>

<!DOCTYPE html PUBLIC "-//W3C//DTD HTML 4.01 Transitional//EN" "http://www.w3.org/TR/html4/loose.dtd">
<html>
<head>
<meta http-equiv="Content-Type" content="text/html; charset=ISO-8859-1">
<title>Insert title here</title>
</head>
<body>
<%
 DBInfo dbInfo = new DBInfo();
 PersistenceManager pm = PMF.get().getPersistenceManager();
 try
 {
  pm.makePersistent(dbInfo);
 }
 finally
 {
  pm.close();
 }
%>
</body>
</html>
Remember, before testing the ServeXML, we need to map the servlet in our web.xml. We also need to run our makeInfo.jsp once before running the servlet.Add the following to your web.xml:
<servlet>
  <servlet-name>Serve</servlet-name>
  <servlet-class>net.jfierstein.listsample.ServeXML</servlet-class>
 </servlet>
 <servlet-mapping>
  <servlet-name>Serve</servlet-name>
  <url-pattern>/serve</url-pattern>
 </servlet-mapping>
Navigate to: http://localhost:8888/makeInfo.jsp
It does not output anything. As long as you didn't get any exceptions, it should have worked. There is no way to tell until you actually try to navigate to http://localhost:8888/serve
We will be able to test /server momentarily. Right now, there is no XML file to serve because we have only created a black reference key with makeInfo.jsp. makeInfo created and stored an instance of DBinfo within our datastore, but the BlobKey that we created initially does not actually exist.
In order for us to actually serve an XML containing the data from our actual Items in the Datastore we must write the servlet that handles looping through each stored Item object and outputting the info in XML format.
To do this I created the class UpdateList.java. This is the most important class that connects the information in the Datastore to the Android application. Depending on how you modeled your data at the beginning of the guide, your UpdateList code may differ slightly. Here is mine:
//UpdateList.java
package net.jfierstein.listsample;

import java.io.IOException;
import java.io.PrintWriter;
import java.nio.channels.Channels;
import java.util.List;

import javax.jdo.PersistenceManager;
import javax.jdo.Query;
import javax.servlet.http.HttpServlet;
import javax.servlet.http.HttpServletRequest;
import javax.servlet.http.HttpServletResponse;

import com.google.appengine.api.blobstore.BlobKey;
import com.google.appengine.api.blobstore.BlobstoreService;
import com.google.appengine.api.blobstore.BlobstoreServiceFactory;
import com.google.appengine.api.files.AppEngineFile;
import com.google.appengine.api.files.FileService;
import com.google.appengine.api.files.FileServiceFactory;
import com.google.appengine.api.files.FileWriteChannel;

public class UpdateList extends HttpServlet
{
 private String fileName = "data";

 public void doGet(HttpServletRequest req, HttpServletResponse resp) throws IOException
 {
  //first query all items
     PersistenceManager pm = PMF.get().getPersistenceManager();
  Query query = pm.newQuery("select from " + Item.class.getName());
  List<Item> items = (List<Item>) query.execute();

  //update DBinfo by setting the new blobKey
  Query dbinf = pm.newQuery("select from " + DBInfo.class.getName());
  List<DBInfo> dbInfo = (List<DBInfo>) dbinf.execute();
  DBInfo currentInfo = (DBInfo)dbInfo.get(0);
  String oldKeyStr = currentInfo.getXMLBlob();
  BlobKey oldKey = new BlobKey(oldKeyStr);
  FileService fileService = FileServiceFactory.getFileService();

  // Create a new Blob file with mime-type "text/plain"
  AppEngineFile file = fileService.createNewBlobFile("text/xml", fileName+".xml");

  // Open a channel to write to it
  boolean lock = false;
  FileWriteChannel writeChannel = fileService.openWriteChannel(file, lock);

  // Different standard Java ways of writing to the channel
  // are possible. Here we use a PrintWriter:
  PrintWriter out = new PrintWriter(Channels.newWriter(writeChannel, "UTF-8"));
  out.println("<ItemList>");
  out.println("<Version>" + currentInfo.getVersion() + "</Version>");
  //loop through items list and print each item
  for (Item i : items)
        {
   out.println("\n\t<Item>");
   out.println("\n\t\t<Title>" + i.getTitle() + "</Title>");
   out.println("\n\t\t<Image>" + i.getImageKey() + "</Image>");
   out.println("\n\t\t<Description>" + i.getDescription() + "</Description>");
   out.println("\n\t\t<Package>" + i.getPackage() + "</Package>");
   out.println("\n\t</Item>");
        }
  out.println("</ItemList>");
  // Close without finalizing and save the file path for writing later
  out.close();
  String path = file.getFullPath();

  // Write more to the file in a separate request:
  file = new AppEngineFile(path);

  // This time lock because we intend to finalize
  lock = true;
  writeChannel = fileService.openWriteChannel(file, lock);

  // Now finalize
  writeChannel.closeFinally();
  BlobKey blobKey = fileService.getBlobKey(file);
  currentInfo.setXMLBlob(blobKey.getKeyString());
  BlobstoreService blobstoreService = BlobstoreServiceFactory.getBlobstoreService();
  try
  {
   //delete old XML file
   blobstoreService.delete(oldKey);
   pm.makePersistent(currentInfo);
  }
  finally
  {
   resp.sendRedirect("viewItems.jsp");
   pm.close();
  }
 }
 public void doPost(HttpServletRequest req, HttpServletResponse resp) throws IOException
 {
  doGet(req, resp);
 }
}
Ok, now this code writes our XML file. It is fairly straight forward. We query all Item objects in the Datastore, and loop through each item, printing a node to the XML file on each iteration. Something to note is that we are using App-Engine's new FileService API for the Blobstore. This important because it eliminates the annoying timeout exceptions that used to make developing anything using the Blobstore a huge pain in the ass.To finalize our App-Engine backend, all we need to do is add one more servlet mapping to our web.xml file and we fully test our web application.
Add the following to the WEB-INF/web.xml:
<servlet>
  <servlet-name>UpdateList</servlet-name>
  <servlet-class>net.jfierstein.listsample.UpdateList</servlet-class>
 </servlet>
 <servlet-mapping>
  <servlet-name>UpdateList</servlet-name>
  <url-pattern>/update</url-pattern>
 </servlet-mapping>
That should take care of all the responsibilities of the App-Engine portion of our demo. Let's test to make sure the ServeXML functionality is working.
REMEMBER to press the Update List button on the viewItems page FIRST before navigating to /serve. /serve should serve up the XML created from UpdateList like so:

If your XML looks like the above output, then we are right where we want to be and our App-Engine serve i now complete.
For the code to the Android application, please view the next blob entry titled "How to create a ListView in Android populated by data from Google App-Engine: Part 2".
Regards,
Josh Fierstein
can you tell what exactly to put in the dummy.jsp file??
ReplyDeletesorry..didnt see u gave that code in the tutorial.. my bad
DeleteLine 24 in PostItem.java gives and error saying : Syntax error on token ",", TypeArgument1 expected after this token
ReplyDeleteAnother error on the same line is : Syntax error on token "=", != expected
Then again on line 32 i am getting an error saying : Syntax error, insert "}" to complete ClassBody
Please help me figure this out
I changed the doPost() method as the following to overcome the problem i mentioned in my earlier comments.. will this work??
ReplyDeletepublic void doPost(HttpServletRequest req, HttpServletResponse resp) throws IOException
{
String title = req.getParameter("title");
String description = req.getParameter("desc");
String pName = req.getParameter("pkg");
Map> blobs = blobstoreService.getUploads(req);
List blobKey = blobs.get("appImg");
ListIterator i=blobKey.listIterator();
while(i.hasNext())
{
BlobKey bk=i.next();
PersistenceManager pm = PMF.get().getPersistenceManager();
Item item = new Item(title, description, pName, bk.getKeyString());
//persist
try{ pm.makePersistent(item); }
finally{ pm.close(); }
resp.sendRedirect("viewItems.jsp");
}
}
Can u tell me how to manually upload DBInfo.java using a jsp file?
ReplyDeletesorry!! i found it!! (makeInfo.java)
Deletehe has given the code in the tutorial ! pls read the tutorial before u comment :P
DeleteHi Josh
ReplyDeleteWould you please explain more about DBinfo and makeInfo.jsp.
Why we need DBInfo?
I think just Item is enough.
Thanks
Hi Josh
ReplyDeleteEverytime you add a new item, you must press the "Update list" button to serve the newest xml data ?
Is it right?
where is the android part?
ReplyDelete